How Do You Turn Something Interesting Into Something Challenging?

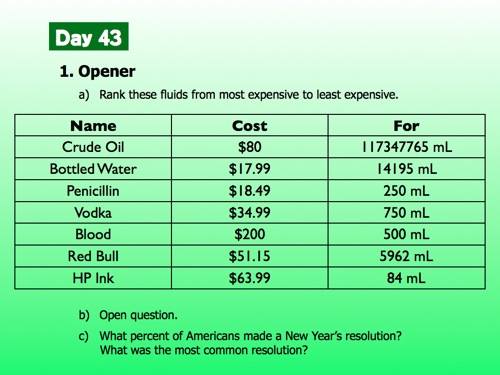
[Correction: an oil barrel contains 158,987.295 ml.]

Nat Torkington writes the Four Short Links column for O’Reilly’s Radar, highlighting interesting articles around the web on a daily (or near-daily) basis. Recently, he’s pitched me a few links via e-mail under the heading “WCYDWT?” which, due to my fallen nature, I have taken as a challenge to my sacred honor.

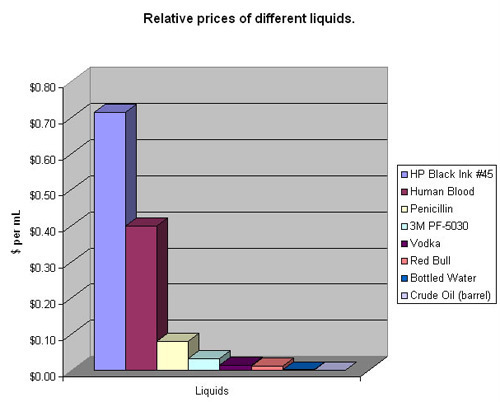
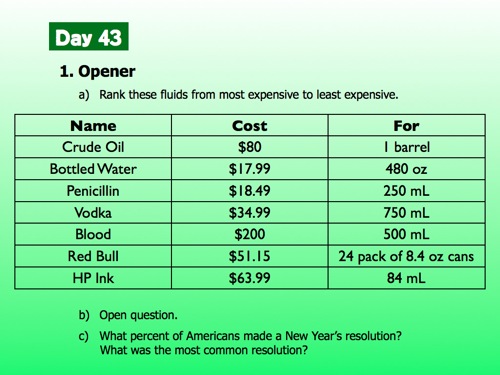
Here’s one: the relative price of different liquids which illustrates the disturbing fact that HP printer ink is several orders of magnitude more expensive than crude oil.

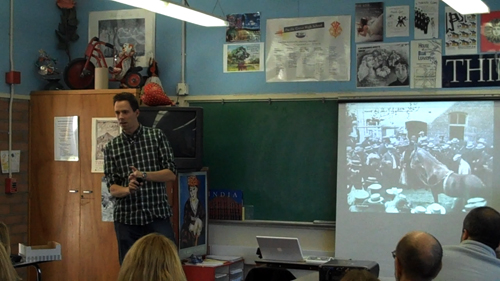
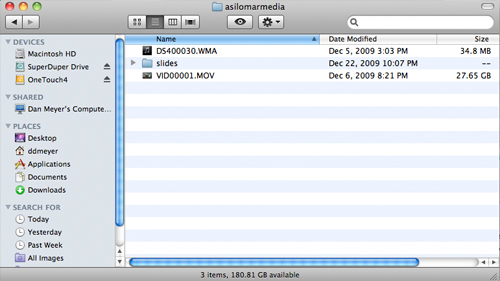
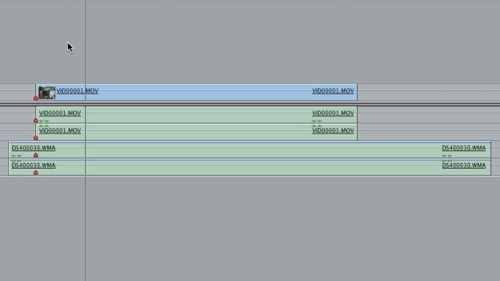
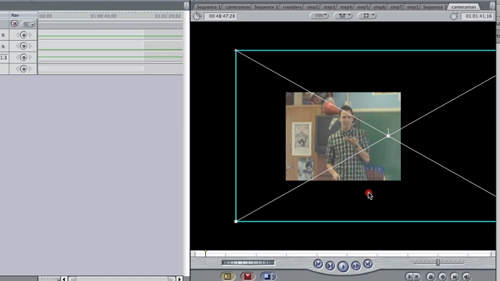
So I opened our first day back from winter break with a learning moment built around Nat’s link and then recorded video of the moment which you’ll find below. My apologies in advance for the pitiful production value. Initially, I was going to forward this only to Nat as some kind of retort but I found the experience so difficult, messy, and exhilarating, I had to debrief myself here. Notwithstanding the video quality, you’re welcome to pummel me for anything you see.
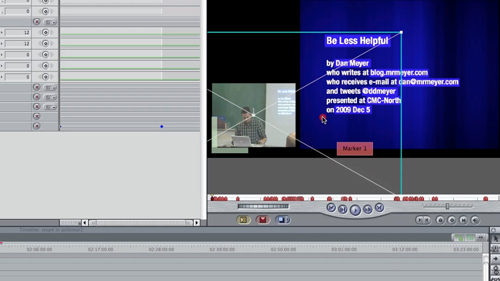
Classroom Video

Classroom Video โ€“ HP Ink Costs More Than Blood from Dan Meyer on Vimeo.

Color Commentary

Synonymous with “What Can You Do With This?” is “How Do You Turn Something Interesting Into Something Challenging?” I have asked educators that question on this blog, in online classes, and in several conference presentations over several years. Here is โ€“ by far โ€“ the most common answer:

“I’d put it on the wall and we’d talk about it.”

Which is a weak start. A certain kind of student inevitably dominates these pseudo-Socratic discussions and then invites another kind of student to disengage. But Nat has dealt us a strong hand. If we play those cards right, we can retain and empower a lot of those (mathematically and conversationally) reticent students.

1. Calm down with the math for a moment. Invite their intuition.

At one point in my career, I would have led this off by giving them all the data and asking them to compute the ratio of cost to volume. but my blue students are poorly-served by that approach. So many of them have been burned so badly by math that if I open the conversation with terms like “ratio” and “volume,” pushing numbers and structure right at them, I’ll lose the students I want to keep. Moreover, this confuses master with slave. We use math to make sense of the world around us more often than the reverse.

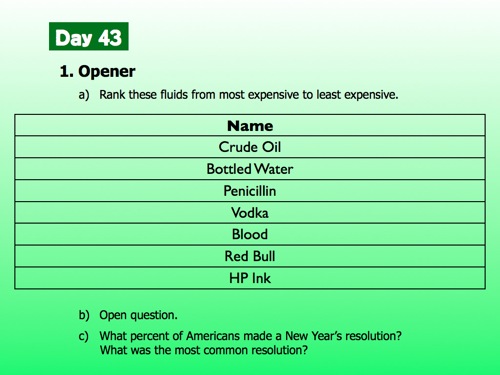
So I put seven liquids on the wall and asked them to rank them from most expensive to least. Simple speculation. Nothing more mathematical than that. Please imagine, here, how much more fun it is to walk around and talk about the question, “Which do you think is the most expensive?” rather than the lead balloon “Which has the highest ratio of cost to volume?”

Ask a student to come up and share her ranking with the class. Argue a bit. Entertain opposing opinions. Ask a student if he’d trade a can of Red Bull for a can of his own blood. Student investment at this point is very nearly 100%. It’s mine to lose.

2. Slowly lower mathematical structure onto their intuition.

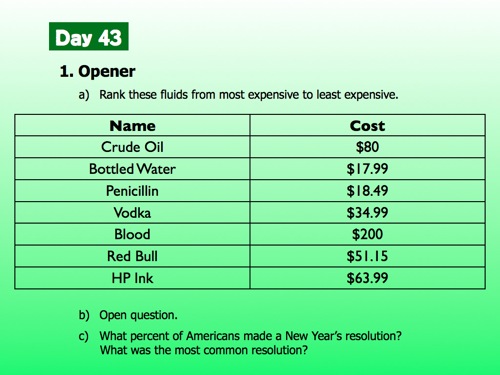
“Here’s the answer,” I told them, but students know at this point to triple-check me. Several went straight for Red Bull, which totes does not cost $51.15.

“So you’re saying that how much you get matters as much as how much it costs.”

Fine.

We used cell phones to text Google and ask for unit conversion. This always strikes my students as magical and suspicious.

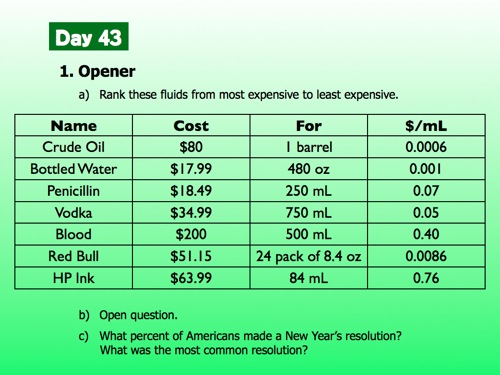
And here, finally, we talked about the ratio of the cost of blood to how much blood you get. I asked them to visualize one milliliter of blood. “What does .40 mean?” We talked about the cost of one milliliter and how it’s useful to compare that cost across liquids.

The rest (hopefully) writes itself, though, for the record, I kind of hate how explain-y I get in the last third of the video.

The Virtuous Cycle Specific To Our Line Of Work

  1. Find an interesting thingIt’s sad how often the conversation with other teachers ends here, after it becomes obvious that they just aren’t interested in all that much..
  2. Transform that interesting thing into a classroom challenge.
  3. Help your students develop tools to resolve that interesting challenge.
  4. [Optional] Blog about it.
  5. Repeat.

The feeds in your reader then spiral upwards and out of your control. WCYDWT ideas begin to pile up faster than you can capture them. It’ll freak you out and you’ll wish you could turn it off for just a few hours while you’re watching TV but you realize this a rare ancillary benefit in an occasionally tortuous job and you accept it gratefully.

[BTW: Mr. K rightly points out that this problem is of a piece with the nickel thieves from a few years back.]

[BTW: You should read Burt’s commentary on the lack of real-world meaning of these statistics.]

[BTW: Great list of liquids and prices here.]

In Further Praise Of Rhett Allain

I read about Panasonic’s proposed lithium-ion battery this morning. This afternoon Rhett Allain mused idly: “I wonder if I can estimate how big this battery would be.” He then pulled out his unit conversion stick and gave the problem a merciless thrashing, sketching out his estimates, describing possible sources of error, and arriving at the conclusion: “This isn’t too bad – like the volume of a small refrigerator.”

I’ll underscore this until I tear the page:

Rhett eats, breathes, and sleeps his stuff. Physics is on his mind all the time, humming away somewhere at some low frequency. And whenever physics floats by, Rhett knows how to bring it down, stuff it with a concise question, and mount it โ€“ร‚ย on the wall of his blog, certainly, and presumably also in his classroom. He makes this look way too easy.

In Further Praise Of Kate Nowak

Kate Nowak put herself in harm’s way this school year, teaching directly between:

  1. the edublogosphere’s Leading Thinkers, those insisting that little else stands between Kate’s students and meaningful 21st-century learning except Kate herself, and
  2. reality, where Verizon doesn’t cover her school, where her digital natives don’t have cell phones, where few have encountered a blog in the wild.

It’s impossible to have been a bystander in this struggle and not share her elation in her recent post titled I Finally Used the Cell Phones for Something, that “something” being a school-wide scavenger hunt, with students using cameraphones and MMS to verify their checkpoints.

Kate doesn’t claim this is any kind of monument to 21st-century learning. But she is slowly and deliberately recruiting her students’ personal technology for academic use, introducing them gradually to implementations of that technology that our Leading Thinkers assume need no introduction.

That struggle has come at considerable cost to Kate’s morale, as is fairly obvious from her grim, recent tweets. Let’s applaud her efforts, therefore, and encourage her to seize the rest of winter break for recovery. Education doesn’t have enough pragmatic adventurers to spare.

What Can You Do With This: The $6400 Question

I’m not claiming any kind of rigorous activity here. This is just a cute clip from Parks and Recreation, the best American comedy on TV right now, that begs one, maybe two good questions. I’ll throw this on an opener.

Click through to view embedded content.

What useful questions could we ask here?

Professional Conference Video With Semi-Professional Equipment

Professional Conference Video With Semi-Professional Equipment from Dan Meyer on Vimeo.

Two weeks ago, I posted the conference video from my CMC-North session. The slides were synced to audio, which is nothing new, but also to video of my delivery of the material, which appeared next to the slides. There wasn’t a camera operator at my session but the camera panned around with me anyway as I walked the room.

I’m happy with this. The process is so easy that I’ll be able to record and post all future conference sessions I host. Then on the plus side:

  1. People can attend my talk even if they aren’t at the same conference on the same day. (I had 40 attendees in Monterey. Several hundred on Vimeo.)
  2. I can review myself and make notes for my next session.
  3. This keeps with my intention to be as open as possible about my practice.
  4. My parents can call me up and criticize the clothes I wore.

I edited a screencast explaining the process and posted it above. If you aren’t into video, here are some broad strokes in text.

1. Set up your equipment.

You need something to record video and audio. I turned on an Olympus DS-40 lapel mic (which I’m not very happy with โ€“ suggestions?) and set a Flip HD on a shelf in the back of the room. Make sure your camera can see at least some part of your slides.

Do yourself a favor: clap. With both devices running. Trust me here.

2. Assemble your material.

Export your slides from Keynote or PowerPoint as high quality TIFF images. You now have these ingredients in a folder: audio file, video file, slides folder. Drag them all into a new Final Cut Pro project. Then drag the video into a new sequence. Drag the audio in also.

3. Sync everything.

Find the clap in the video. On that exact frame, press M to lay down a marker on that track. Find the clap in the audio and lay down another marker. Position the markers on top of each other. The audio should now be fairly closely aligned. You may need to nudge the audio track forward or backward a few frames to get it exact. Press +1 or -1 a few times until it looks perfect.

Find a good starting and ending point for your talk and then crop both ends using the blade tool.

My Flip records video faster than my audio does (I don’t really get this) which means the sync gets really slippery by the end so I had to change the speed of the audio clip to 99.8%.

Now watch your entire presentation. Whenever you change the slide, lay down a marker. Then go into your slides folder and drag each slide to meet its marker.

4. Go back in time and hire a cameraman.

Now you have really good audio and really good slides. The video is pretty good too but takes up way too much room. There’s lots of empty space around you which we’d love to crop out. Create a new sequence called “cameraman.” Paste in your video track. Go into Effects > Video Generators > Shapes > Rectangles and drag a rectangle on top of the footage. Change its Softness in controls to 0%. Go into Effects > Video Filters > Key > Luma Key and drag it onto the rectangle.

Now you have a cardboard stencil on top of the video. This next part is almost impossible to explain in text and it’s also the most important so hit the screencast (approx. 7:00) if this doesn’t make sense.

Position yourself in the frame. If you stayed in that small window for your entire presentation, bully for you. You’re done. But if you paced around like an angry hamster (as I do) you need to set a keyframe for center in the controls tab. Then, whenever you start to move out of the frame, set another keyframe for center. Once you stop moving, reposition yourself in the window and set another keyframe. Final Cut Pro will “interpolate” the middle passage between keyframes making it look like you had a cameraman panning around with you the entire time. Nice! Keep doing this throughout your presentation.

5. Composite the results.

Drag the cameraman sequence from the browser on top of the video track in your original sequence. One should replace the other exactly since they’re the exact same length. Now you have great slides, great video, and great audio. The slides cover the video, though.

So select all of the slides. Go to Sequence > Nest Items. This will let us manipulate them all at the same time. Right-click on the slides sequence and go to “Open in Viewer.” Go to Controls > Motion > Crop and bring the right and left edges in to meet the slides. Now in Controls > Motion > Scale, bring the size down a little.

Then drag the cameraman track to the lower left of the frame and your slides to the right, creating equal space around them.

Bam.

6. Export.

The goal in the export is to sneak your video beneath Vimeo’s 500MB upload ceiling on its free account. Modify Vimeo’s recommendations. Keep the audio at its highest quality but you’re going to have to sacrifice video quality, which isn’t really a big deal because the video track is dominated by huge slides that don’t change very much. I set the bandwidth restriction to 500 kbps.

7. Final notes.

You’ll have to render a lot and the final export will lock your machine up overnight. But this process is great because it frontloads the easy stuff and backloads the difficult stuff, which is exactly the right balance when you’re giving a presentation, when you don’t want to focus on complex technical details.

I post this tutorial because, selfishly, I hope other people take me up on it so I can attend more interesting talks without having to leave my living room or brush my teeth.